DIY HARDWOOD FLOORING INSTALLATION
Hardwood flooring is a type of flooring that is made from solid wood. It is known for its durability, natural beauty, and timeless appeal. Hardwood floors are made from various types of wood, such as oak, maple, cherry, and walnut, each with its own unique grain pattern and color. The planks are typically milled to a specific thickness and width, and they can be installed in different patterns, such as straight, diagonal, or herringbone, to create a desired look.
When it comes to hardwood flooring, you can expect a high-quality and long-lasting option for your home or office. The natural characteristics of hardwood, such as its strength and resistance to wear and tear, make it a popular choice among homeowners and interior designers alike. Additionally, hardwood floors can be sanded and refinished multiple times, allowing you to refresh their appearance and extend their lifespan. This versatility makes hardwood flooring a wise investment that adds value to any space.
Hardwood flooring offers a wide range of benefits beyond its aesthetic appeal. It is a hypoallergenic option, as it does not trap dust, pollen, or other allergens like carpets do. This makes it an excellent choice for individuals with allergies or respiratory sensitivities. Furthermore, hardwood floors are easy to clean and maintain. Regular sweeping and occasional mopping are usually sufficient to keep them looking their best. With proper care, hardwood flooring can retain its beauty for decades, making it a practical and stylish choice for any room in your home or office.
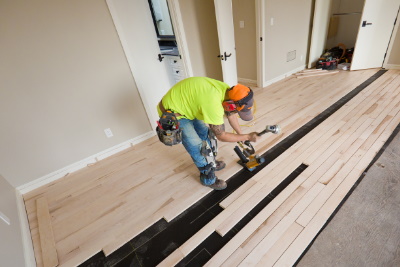
The installation of hardwood flooring involves several steps. First, the existing flooring needs to be removed and the subfloor prepared. Then, the hardwood planks or strips are laid down, ensuring they are staggered and properly acclimated to the environment. The planks are secured to the subfloor using nails or adhesive. Once all the planks are laid down, the floor is sanded and finished with stain or sealant to protect and enhance its appearance. Overall, proper installation is crucial for the longevity and aesthetic appeal of hardwood flooring.
Hardwood flooring installation made easy with DIY techniques. Installing hardwood flooring can be a daunting task, but with the right tools and knowledge, it can be a rewarding DIY project. By following a few simple steps, you can transform your space with beautiful hardwood floors that will last for years to come.
Step-by-step guide to installing hardwood flooring on your own. If you’re looking to upgrade your home with hardwood floors, why not try installing them yourself? With the right preparation and a little patience, you can achieve professional-looking results without the need for expensive contractors. From measuring and preparing the subfloor to laying down the planks and finishing touches, this step-by-step guide will walk you through the entire process of DIY hardwood flooring installation.
Empower yourself with the skills to install hardwood flooring on your own. Why pay someone else to install your hardwood floors when you can do it yourself? With the right tools and techniques, you can save money and gain the satisfaction of completing a home improvement project on your own. This comprehensive guide will provide you with all the information you need to confidently tackle hardwood flooring installation, from choosing the right type of wood to ensuring a smooth and durable finish. So roll up your sleeves and get ready to transform your space with the timeless beauty of hardwood floors.
Rent this trailer package toolkit for your hardwood floors!
List of tools that will be in this trailer
- Dewalt 10 inch miter saw
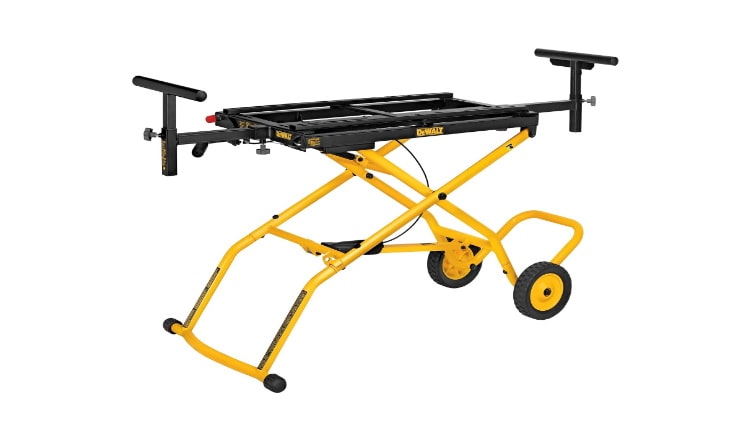
- Dewalt miter saw stand with wheels
- Dewalt 10 inch table saw with stand
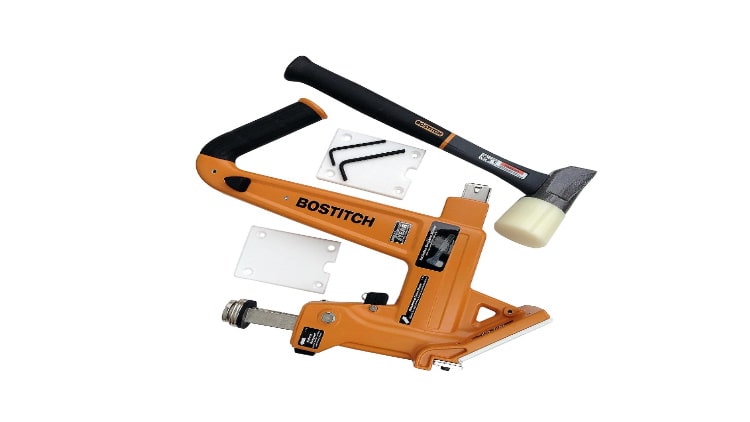
- Bostitch MFN-201 Manual Flooring Cleat Nailer Kit. Cleats can be purchased here: Our Amazon Storefront
- Dewalt Cordless Jigsaw with (1) fast cut blade (Buy more cutting blades in extra options)
- Dewalt Atomic Brushless Cordless Drill Driver
- Dewalt 20V 9 AMP battery (1)
- Dewalt 5 AMP batteries x2
- Dewalt jobsite radio ( battery charger inside )
- Dewalt Multi tool cutter with (1) wood blade (More cutting blades in extra options)
- Dewalt 18 gauge brad nailer for trims with 1 row of 2″ nails (More 18 gauge nails in extra options)
- Dual battery charger
- Ridgid Shop Vac
- Extension Cord with Power Bar
- Milwaukee 30ft Tape Measure
- Jimmy prybar scrapper or puller
- 7 inch carpenter’s square
- 1″ Olfa knife with 1 blade (More blades in extra options)
- Multi Angle Miter Shears Quarter Round Cutting Tool
- Caulking gun with (1) DAP tube (More DAP in extra options)
- 1 pair of safety glasses
We use these tools everyday. Proven performance. See a tool you like? You can purchase here: Our Amazon Storefront


